Lanes

Lane shape editing

Lanes Tab

Edit lane paths, carve lane sections, adjust widths, and use the LaneShape preview/editor to build custom driving lanes, kerbs, gutters, walls, and profile-based lane geometry.

Back to Documentation

What Lane Styles are for

A Lane Style describes one lane section inside a road. A Road Style uses one or more Lane Styles to build the final road cross-section. This makes it possible to create roads with different lane types while keeping the setup reusable and consistent.

  • Use Lane Styles to define driving lanes, shoulders, sidewalks, footpaths, medians, edge strips, verges and special-purpose lanes.
  • Use them when several Road Styles need the same lane type, width, material or behaviour.
  • Use lane roles so Road Constructor can understand what is drivable, what is decorative and what is used as an edge or support lane.
  • Use the preview tools to check width, direction, side placement and lane order before applying a Road Style widely.

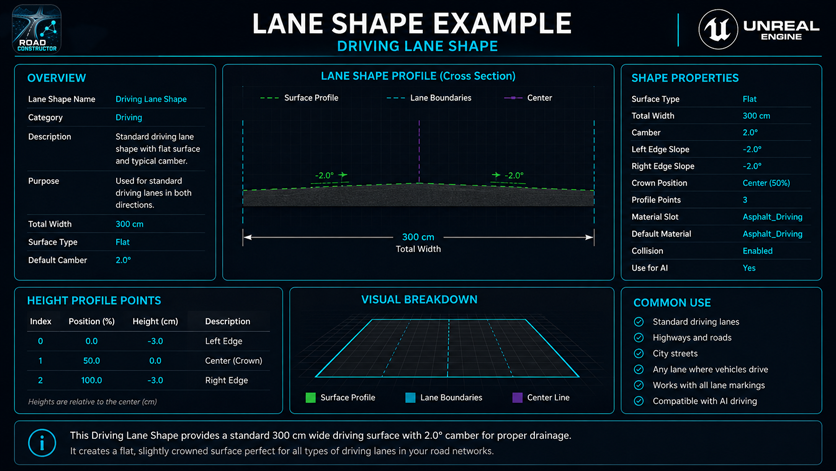
Example - Driving Lane Shape

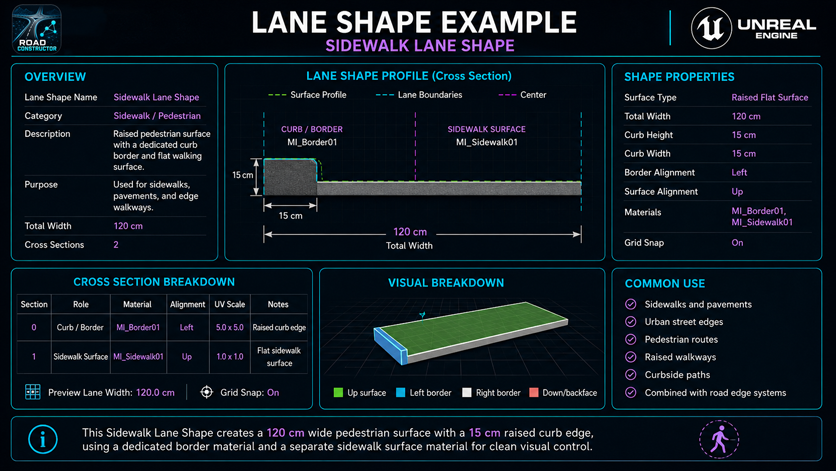
Example - Sidewalk Lane Shape


Simple idea Think of Lane Styles as the building blocks inside a Road Style. A Road Style is the full recipe for the road, while a Lane Style is one ingredient in that recipe.


Main workflow

Creating and managing Lane Styles

Identity and lane role

Width, placement and direction

Surface material and UV setup

2D and 3D previews

Lane Styles should be checked in both preview form and real road output. 2D previews are best for structure and order. 3D previews are best for visual scale, material response and the way the lane reads in space.


Using Lane Styles inside Road Styles

Lane Styles become most powerful when they are assembled inside Road Styles. A Road Style can use multiple Lane Styles to define a complete road, including driving lanes, shoulders, sidewalks, medians and special strips.


Basic placement example

  • Create or duplicate a Lane Style called Driving Lane.
  • Set its role as a driving lane and set the intended width.
  • Assign an asphalt or road-surface material and adjust UV scale.
  • Create or duplicate a second Lane Style called Shoulder or Sidewalk if the road needs an outer lane.
  • Add the Lane Styles to a Road Style in the intended order.
  • Use 2D preview to check lane widths and side order.
  • Use 3D preview or a test road to check materials and height offsets.
  • Create or update a road using the Road Style and inspect junctions, ends and curves.